How to Make a Chandelier (Part 2 (With Friends))

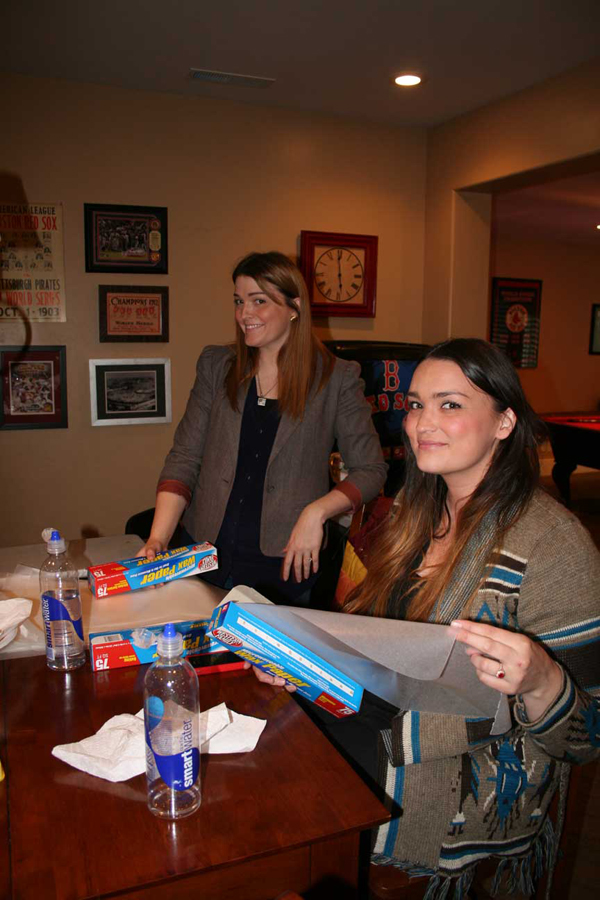
Last Thursday night a gaggle of us ladies got together at the lovely Jane’s house to make the wax paper chandelier, using Brenna’s tutorial.
I’m not going to lie to you, this chandelier is both time + labor intensive. However, we worked assembly line style + were able to finish 4 chandeliers that night.
1. Tear off your wax paper into long pieces. We used 2 – 2.5 foot pieces. (Ann + Amy)
2. Iron your pieces together. We found that you could mass produce these as well. Start by laying down a piece of parchment, then three pieces of wax paper, then a piece of parchment, then three pieces of wax paper. You could layer up to five layers this way. (me + Millie)
3. Cut your circles. We had a couple different cutters. The first time I used made the chandelier, I used this cutter. This time I purchased this circle punch, I felt like it was much more effective + time efficient. 
4. Organize your circles according to the length of sewn circles that you want. We decided that for everyone’s chandelier we would use a strand of 22 circles sewn together. 
5. Sew your circles. We used a technique called chain piecing. Basically you just feed your circles one after another.   (Shelby + me)
6. Separate your strands. (Gygi + Amy)
7. Lay over your frame. This way you don’t have to worry about attaching the string to the frame. Simply make your strand 2 x’s the length that you want your circles to fall, find the half way point + lay it over the frame.
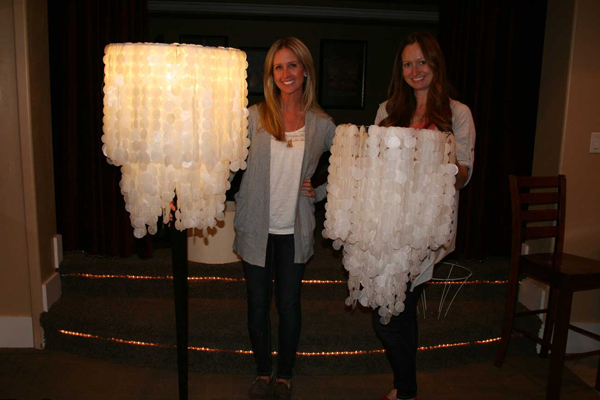
Amy + Sarah’s finished chandeliers.
Jane + Gigi’s.
Jane’s finished light. She choose to make hers into a standing light.
Amy’s finished + installed chandelier.
All images, except Amy’s bedroom, by Jane Rhodes for See Jane Blog. Amy’s bedroom by Amy Furstenau for All That I Love.


Comments

  1. Heather K :
    I love this chandelier idea, and it is SO beautiful!
  2. Elizabeth {e tells tales} :
    WOW! I saw one of these in the bathroom at a fancy store here in AL and died over how expensive it probably was.

    Labor intensive I can do though.

    Bookmarking!
  3. What I Say Matters! :
    I really like this!!! I want to make one now!! I didn't know you could sew wax paper
  4. CatZilla :
    I have been wanting to do this for awhile. totally going to make the leap. :)

    I noticed y'all used a few different styles/sizes of lampshades/hanging baskets(?) for your frames. Did you find a preference for one over any others? Square vs. Round, 2 layer vs. 3 layer?
  5. Ren- Lady Of The Arts :
    wow- that is amazing-it looks like a really fun night and so great to have something to take home for unique decor!
  6. Hopeless Chest :
    Holy cow!! Now that was productive. What a fun DIY and a good evening with friends it looks like.
  7. enie meenie :
    what a fun project to do with friends, it looks sooo expensive too.
  8. {jane} :
    time intensive---amen!

    but totally worth it, and i'd do it again! {hoping you would still be helping! lol!}
  9. featherfactor :
    Wow amazing job - these look beautiful! What a great project to share with friends..

    www.featherfactor.com
  10. Melanie :
    Yet another reason I need to live near you. Are you accepting roommate applications?
  11. mandiegirl :
    How fun! I'd love one of these!! :)
  12. Jordan :
    Those are awesome and I love her polaroid heart above her bed.
  13. Michelle :
    I love the chain piecing!!! this is amazing.. good job ladies! :)
  14. Lanna :
    I love this Chandelier project! I used to work at Anthropologie and it reminds me of one we had there that sold for almost $300! This is way less expensive and just as gorgeous!

    Follow me at: http://lannalsu.blogspot.com/
  15. {lovely little things} :
    Wow that's so cool! I've never seen anything like this, very impressive!
  16. erica :
    way to go ladies!
    seriously seeing all these pictures gives me the itch to make one again.
    we had so much fun doing it.
    (even more fun after is was over. ha)
    thanks for the heads up.
    was wondering if you guys had any problems with the circle punches breaking?
    we used a different one than you have linked but we broke two of them :(
    the alignment just got off and wouldn't punch anymore.
    could have been that i was trying to punch too many at a time.
    just curious.
  17. The Rentschlers :
    I love the pictures, I didn't take enough! I made a wax paper chandelier, inspired by you. It cost me around $10. Also made a little girl happy. I post it on my blog. Thanks so much.
  18. Jesse {GoodGirlGoneGlad} :
    I have really been contemplating doing this! Makes me want one SO bad!!
  19. Ashley White Interior Design :
    These are so amazing! I can't wait to make one for my son's room. I was thinking doing the circles in a color, possibly blue or green, might be fun too!
  20. Lesley Ward :
    Hye there! I am loving your blog! So I would be your newest follower, please check out my new blog and follow me back :)
  21. Nine Red :
    Beautiful! I'm about to get ready to do this project, but I was wondering something, I see in the pictures where you punched the circles... the link you have goes to a fiskars squeeze punch, but how did you punch the middle of the sheets that way? The ones the girls are using there look like boxes, almost cookie cutters, any help would be magnificent!! thanks!!
  22. the lil bee :
    What an ambitious but awesome project! I love the finished shots. And you should probably give Amy a heads up that I'll be moving into her bedroom permanently. LOVE!
  23. Rachel :
    Ever since your last post about your chandelier, I've been dreaming of making this--- and I'm about to redo my family room: might just be the perfect thing! LOVE LOVE LOVE this idea!
    (and I was floored when you commented on my blog post the other day about the little crayon wrap... I can't believe you saw my blog! haha. I feel so honored). :)
  24. Lesley Ward :
    Oh no no no, just 1 bun in the oven for me! I just put 2 pictures of him that I love on my blog header :)
  25. Disco Jess :
    Thank you so much! (jesse of 9 red)
  26. Jules :
    Can you tell me what the finished length of your strands are and ,also, what type of thread did you use? Thanks.
  27. Gabriela Murphy :
    Very good post here. I like all the Chandeliers in beautiful drawing rooms.

    Chandeliers
  28. robin :
    what size of circles did you use?
  29. Susan :
    jules,
    we used 21 circles + laid the strands over the frame.

    robin,
    1.5 inch.

    xo
  30. Lori :
    These are so great! And, timely as I was *just* thinking yesterday about whether this would be feasible! I think I need to pick up some waxed paper. :)
  31. Serendipity :
    I love this! I'm thinking of making one this weekend.

    However, I have NO sewing skills whatsoever. Do you have any ideas of how I can attach the circles together sans sewing? The Design Sponge tutorial is great but I like how yours came out without the ribbon. Looks a little more authentic. Any ideas? Thanks
  32. Ashley :
    I saw you segment on Studio5 and fell in love with your project! I think I can totally do it. My livingroom is so blah...This will definately liven in up :)
  33. RobbieLee at Chickiedee :
    Very very very impressive! Thanks for sharing!
  34. Kim :
    I absolutely LOVE this idea! I just have one question. Have your wax paper circles seem to have held up since you've been using your chandelier? I just wouldn't want them to overheat or catch fire or anything. Seriously, though. This is an amazing idea. :o)
  35. mb :
    I was wondering the same thing as Kim. I have already started but would hate to go through all this work for a chandelier that holds up for a week.
  36. Susan :
    it still looks awesome. we used cfl light bulbs which don't get very hot at all. i haven't even had to dust it yet. hope this helps ladies!
  37. Aquablue :
    Okay I am totally inspired!!! We have a 8.5' long harvest table and a Beach/Coastal theme in our house so this light is perfect to hang over our table. I have been coveting this light from west elm http://www.westelm.com/products/large-rectangle-hanging-capiz-pendant-w425/?pkey=e%7Ccapiz%7C3%7Cbest%7C0%7C1%7C24%7C%7C1&cm_src=PRODUCTSEARCH||NoFacet-_-NoFacet-_-Common%20Rule%20Top%20Wide%20Kitchen-_- but don't like the price tag :( .

    I have purchased 2 rectangle baskets that I plan to attach and add another row of wire. I am thinking about adding aqua and green crayon shavings between the wax paper layers, but will have to test.
    Wish me luck!

    For got to ask, how many rolls of wax paper is needed for one chandelier?
  38. Susan :
    @auquablue, we used between 3-4. i love the crayon shavings idea. i actually did that for a little banner + it worked great.
  39. Felicity :
    Can't wait to try this. Thanks for the inspiration.
  40. emily d :
    Where did you get your amazing bedding?!
  41. Susan :
    @emily d i made it.
  42. Liesl :
    Holy Moly! I love it...I can imagine this took some time, but all look so cute doing it and what a beautiful outcome! This would be so perfect hanging in a walk-in closet or bed room or office...love, love, love!!!

    Liesl :)
  43. Melissa :
    Thanks for the awesome tutorial! I will be making one for my daughter's bedroom in her new condo. I may have to make a second one for my home office! Thanks again. LOVE, LOVE, LOVE!
    • Susan :
      awesome! i'd love to see a pic when you are done!
  44. Katie from Loverly She :
    Oh my, this project is a MUST.
  45. katie :
    I am dying to know where you got you bedding from the last picture! Please email me! Katie.Doty@Yahoo.com...thanks
  46. Amanda :
    Beautiful chandelier! I love the heart photo collage too, and the bedding. Can I as where you bought the bedding and mustard colored throw? Love it all!
  47. Nana :
    thought: put crayon shavings between the sheets of wax paper - like the old elementary school projects - add color. Or dried flowers scattered here and there....
    • Susan :
      that sounds so cute!
  48. tabitha :
    Love it!!! Wondering if the circles could be cut out of anything else, cause i would absolutly love to make one of these for my daughters room but would like to make it out of lots of bright colors to match her things!
    • Susan :
      good question tabitha. i've seen them out of paper and it looked darling!
  49. candy :
    where did you get the frame to hold the strands?
    • Susan :
      at the thrift store! its an old lamp shade.
  50. Erin :
    Probably a weird question but where did your friend get her bed set from? I just love the design and the colors!
    • Susan :
      anthropologie i think.
  51. ashley h :
    Where is the green comforter from? I love it!
    • Susan :
      anthropologie i believe.
  52. Laurel :
    So I just began making this and I cannot get my circle to turn out nice AT ALL. I bought the same puncher you used but it always leaves flakes on the sides. Any recommendations? How did you make your way paper stiff enough for the puncher to slice through nicely (I did try my puncher out on thin cardboard and it worked like a charm). Thanks :)
    • Susan :
      hi laurel, did you iron a couple of pieces of wax paper together before punching? also if your puncher is dull, you can punch some aluminum foil and it should sharpen right up. s.
  53. Pingback: Bethany (bethany_quitral) | Pearltrees

  54. Pingback: DIY | Pearltrees

  55. Chelsea :
    How fun would it be if you put crayon shavings in between the sheets of wax paper!
  56. Corrina Bella :
    I am definitely going to do this... also going to add some color by adding a few crayon shavings in between the wax layers before ironing. I'm thinking a pale aqua would be heavenly. Thanks for the inspiration!!
    • Susan :
      awesome! that sounds amazing.
  57. Christi :
    My mother had a chandelier made of very thin white and blue shells that was like this. Eventually too many of the shells had broken and she took it down. What a great idea, to use wax paper instead! I will have to suggest a mother daughter craft day to make her one.
  58. Nancy :
    I love it , just thing of the different possiblites you can do with this . Different colors or babies. Porches ! I love it
    • Susan :
      love!
  59. rachael :
    could this be done with freezer paper? I LOVE it. It would look perfect in my daughters room.
  60. Rebecca :
    So I was ready to start my project and went to Costco in hopes of buying the wax paper in bulk. When I got home, I realized I had "dry wax paper" and not the traditional kind. Will this work? Has anyone else used this paper? Is this paper safe versus the other wax paper? I'm ironing and it isn't binding together to make layers...help!
  61. Caitlin :
    I wonder if you could iron a piece of tissue paper between two sheets of wax paper in order to make it colorful?
  62. Kimberly :
    Many Questions: -Do these present any kind of a fire hazard having them so close to the bulbs? -Did any on find a way to add color? -How did you hang them from the ceiling? Thanks! So excited to start!
  63. Lindsay :
    Totally love this!!! How did you hang it up on ceiling and did you hang it over a light fixture? Thank you:)
  64. Geraldine :
    What an "enlightening" idea, and oh sooo elegant.
  65. teri :
    I really want to make one of the chandler's but is it a fire hazard because it is paper? ? Have you seen any with Color in them?
  66. Lynn :
    I need info, why are you ironing ? Your sewing them together? Would it.net easier to use like silver thread help me understand.
    • Susan :
      That is the great thing about this project, you can make it your own! I've chosen to do it this way, but I would love to see how you do it!
  67. Courtney :
    In the picture where you are cutting out the circles. Which cutter is being used?
  68. Nikki :
    New follower here. I clicked through a link on pinterest, and am so glad I did! This is amazing, looks fun, and will save me $1500. on a chandelier I have been drooling over in a boutique in San Francisco. Thank you so much for sharing!
  69. melanie :
    Did you know you can iron tissue paper between 2 pieces of was paper? Itd be awesome to make them in different colors!
  70. katie :
    how do you attach this to a floor lamp?
  71. Lisa :
    This is such an amazing project! I have been on a search for the perfect capiz shell chandelier for years! I have made smaller versions of this with colorful cardstock (used a teeny hole punch to connect them with jewelry metal rings for my kids' rooms) but I LOVE the sewing idea. Even after watching the link on the chain sewing, I am confused on how they won't just all sew together and not "dangle". Does that make sense? Maybe I need to just try it to understand better since I learn better by doing. Thanks for the beautiful project!
  72. Jeri Niksich :
    Can you tell me where you got the frame for this chandelier? I would love to make one with my grand daughter who is learning to sew? If possible could you email me where you got the frame. Thank you so much.
  73. Dana Whisenhunt :
    Love this idea. But I have one question. What kind or frame did you use? Where did you get it?
  74. Kara :
    Trying to layer the wax paper, but it isn't staying together. I noticed you are just using generic for that, so quality of it shouldn't be a factor. Any suggestions? I really want to do this for our bedroom.
  75. Roslyn :
    Hi, I just wanted to compliment everyone on their wonderful chandeliers. They are beautiful and you all did a wonderful job!
  76. meg :
    So each circle is three layers of waxed paper? Do you think it would work to sandwich a piece of tissue paper between two layers of waxed paper...would give color/pattern to the chandelier.
  77. Melissa :
    I have the same circle punch that you have. (The second one that you listed and found to be more efficient.) Did you find that the wax paper got stuck around the edges? I tried a 3-layer of wax paper and the cutter didn't like it at all. Than I tried just two layers ironed together and had more luck but still over half of them seem to be getting stuck. Any suggestions?
  78. Sarah :
    Gorgeous! I'm going to makes these for my wedding! Thanks for the idea! Looks so much easier than the one I saw that used paraffin wax. Where did you get the frames? And does the wax paper ruin the iron at all? My fiancé uses our iron every day for work and would kill me of it did lol.
  79. Jill Gregorski :
    Just finished my chandelier and it turned out great!! What was the best way that you found to attach it to the ceiling. I also used an old lampshade.
  80. Sarah :
    Nvm I saw you already answered my question in an earlier comment! She has the link for the cutter she used in the caption below the picture. My Recollestions hole punch isn't working at all :(. Guess it's time to upgrade.
  81. Shaye :
    Is there a special trick to the Fiskars punch because I end up having to trim the edges and they're not as neat as yours...
  82. Alma Rodriguez :
    Where can I purchase a puncher and frame where u put the circles
  83. Jessica :
    Where did you get your wire baskets? I have made these in the past but I couldn't find big enough baskets to suit my large-scale taste :)
  84. Pingback: Wax Paper Wedding Details « David Tutera Wedding Blog • It’s a Bride’s Life • Real Brides Blogging til I do!

  85. Tara :
    This is amazing project! I wouls love to make one, however I'm worrried about the light bulb, does it not give off to much heat? Or is there a specific type to use?
  86. cindy :
    great idea where would one purchase the circle punch and what size circles did u cut
  87. Pat :
    These are very pretty. I stil have a three tier capiz shell hanging that I bought when I was living in Thailand back in 1973-74 and turned into a lamp. The shells have more of a creamy off-white color. You might get this effect with the tissue paper idea. They really are lovely. Like others, I'd like to know how well they hold up. Does the wax paper curl over time or remain flat. This is an ingenious idea for a very cost effective faux capiz. I'm thinking about making them or my granddaughter's bedrooms. Thank you for sharing your idea.
  88. Cynthia :
    I wish I had friends like u guys.... None of my friends find art interesting... How I wish I could join your gang...
  89. Marie :
    My sister made a ginormous one of these for a school graduation held in a hockey arena......it turned out beautifully and she had hundreds of compliments.
  90. Pingback: Up-do’s, a Gallery Wall, & Downton Abbey <3 {OHP} | housegirlhaley

  91. loreta :
    That looks so awesome,how do u have Kirilenko's jersey?
  92. Shelia :
    we have been looking for something like this for my daughter's room, love it. Two questions. Where and what types of frames did you use? and How do you attach to the ceiling?
  93. Tera :
    I'm thinking instead of sewing choosing a metallic silver tape to add flash and ease.
  94. cindy :
    Sheila, she used a lamp shade frame turned upside down. I have no idea how they installed them on a lamp and on the ceiling either and would love the answer to that question. Several have asked.....
  95. Vanessa Heard :
    This is gorgeous! How did u layer the lampshade and what type of bulb did u use and finally do u hang them on the ceiling and how many strips of 22 circles does it take to do an average chandelier.
  96. Emily :
    So, I decided this was going to be my project this weekend & it is complete! I LOVE it!!! Thank you so much for the tutorial!!! I live in a rental and this was a great way to add a little something something to my dining room with out worrying about my crazy landlady having a hissy-fit! Thank you!!!
  97. Pingback: Faux Chandelier | The "Oh Shiny!" Crafter

  98. Kathy :
    I love this, my daughter loves this and wants 5 for her outdoor wedding!! We are having a hard time finding lampshades. Do you know what the diameter of the largest ring is? I am thinking I could use wire rings or hoops and then wire them together in layers.
  99. Hannah :
    Hi! I started making this today and i have about 100 punched out circles (still a lot to go). But I cant find the form to tie the strands to! Ive looked online and in a bunch of craft stores? where did you guys find yours?
    • freshlypicked :
      it's a lamp shade from a thrift store that i stripped down to the wire!

Leave a comment

You may use these HTML tags and attributes: <a href="" title=""> <abbr title=""> <acronym title=""> <b> <blockquote cite=""> <cite> <code> <del datetime=""> <em> <i> <q cite=""> <strike> <strong>

  • Follow

  • About

  • Newsletter Signup

    Sign up for insights and deals

  • Shop

  • Archives

  • Separator

  • Sponsors