Pillow Tutorial: Envelope Back

Here is the tutorial for the envelope pillows that were made during my class at Alt Summit. I decided to go with the envelope back pillow because it just might be the easiest thing that you’ve ever made.

First choose a pillow. Any pillow will do. For this tutorial, I used a 12 x12 pillow.

Then cut 3 pieces:

Front piece, 12 x12 inches.
Yes, cut the fabric the same size as the pillow, this makes the finished pillow look fuller.

Then cut the two back pieces. I used a 6 x 12 inch piece + a 9 x 12 inch piece.

Now we will finish the back pieces.

 Start by ironing one side of each piece.

Press raw edge down 1/2 inch.

Fold + press another 1/2 inch.

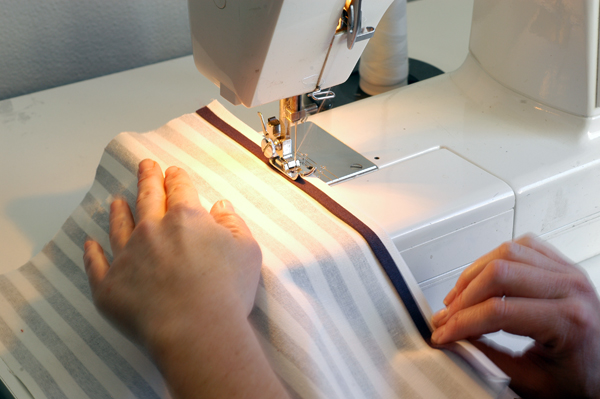
Using a 1/4 inch stitch, hem the back pieces, only one side.

Now assemble your pieces.

Lay your front piece down, face up.

Lay one of your back pieces on top of your front piece, right sides together.

Lay down the other back piece. Line up the corners, back pieces should overlap. Pin the edges.

Using a 1/2 inch stitch, sew along all 4 sides, backstitching in the corners.

Trim your corners.

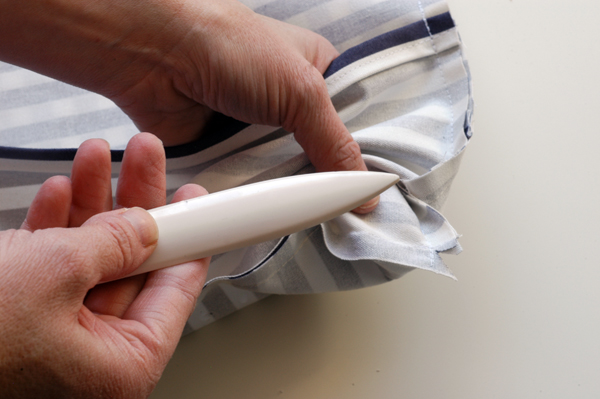
Using a bone folder or chopstick or anything somewhat sharp, push out your corners.

Turn the whole piece

Here is a shot of the back overlapping pieces.

Comments

  1. Girlglasses :
    Love it, thank you!
  2. Jasmine :
    oh yay!
    I have material I have been wanting to make a pillow from for ages but not sure how to do it.. now I know! THanks! :)

    Fiks*d Blog
  3. Admitted Fabricaholic :
    Great tutorial! I have my eye on a few fabrics that I want to turn into pillows, but keep putting it aside...hmmmm

    www.mesewcrazy.com
  4. Angeline :
    Dagnabit - you are so hip! I was just thinkning of how to do this last night (while reading stories to my kids- me- not so hip:) Thank you for the tut!
  5. tori lynn dickson :
    simply beautiful
  6. Mrs. April :
    Yay! Thank you. This is fantastic!
  7. cellophanegirl :
    Congrats on being featured on People.com!!!!!!!

    http://celebritybabies.people.com/2011/02/04/mini-must-have-mason-disicks-cute-moccasins/
  8. Liz R. :
    my MIL, who is an interior decorator and works w/ custom bedding/pillows/drapes etc..., says to make a pillow 1" smaller than the form.
  9. Kim :
    my kind of project!! Thank you! I cannot wait to use this.
  10. Brooke :
    THANK YOU! I have been looking for a good tutorial for these.
  11. Nicolle :
    I just made a duvet cover (+ how-to-no worries, not as good as your tutorial) using the envelope technique! Next up, baby quilt using 1" squares. I miss having crafty friends in Salt Lake...
  12. Sarah :
    I was just thinking that my next project needed to be an envelope pillow such as this. Thank you for making me not think too hard. Mucho appreciated!
  13. meg annan :
    I made 3 of these over the weekend... and I'm not done yet!! My bed & couch extend to you their thanks :-)
  14. {jane} :
    ...you know, after meeting you at alt., and putting your face together with 'freshly picked,' i have quite a few of your shop items around my home from handmade markets...AND, i think you might be in the book club i joined, too. look forward to hopefully getting to know you even better! i'm hosting the next book club in march - if you can make it!!!
  15. skatieperdue :
    Hi, this seems so easy! where did you get this fabric? i love stripes!
  16. Georgie :
    Thanks for this tutorial -- I just added a link to it on my blog, as you explain it so much better than I could, and your photography is beautiful.
  17. Pingback: Videocast: Snappy Stitches – Episode 8 | snappy stitches

  18. Pingback: envelope pillow and quilted pouch | drift here

  19. Christine :
    Question I have is I want to make this envelope backing, my front piece is done in counted cross stitch, pillow form is 14x14. If we are supposed to cut the front piece the same size as pillow form, how do I know how much to trim off of all 4 sides of my counted cross stitch design/piece? Of all the tutorials I've viewed today I like yours the best! But I'm stuck on my front piece? Hope you can help, thank you in advance.
  20. Pingback: be our valentine (pt 2) – the twinery » heartmade life

  21. Pingback: Envelope Pillows: Easy Room Refresher | Sew Fine Fabric

  22. Pingback: 101 Simple Sewing Tutorials

  23. taylor :
    Thank you for this tutorial! I made a pillow cover (10" x 10") but my pillow insert (same size) was way too small. I decreased the cover size to 9" x 9" and it looks ok except for the corners which look flat. Is it just my pillow form or am I doing something wrong? Thanks! laviedetaylor.blogspot.com
    • freshlypicked :
      a good rule of thumb for pillow inserts is that they should be two inches LARGER than the pillow case. so if your cover is 9x9, the insert should be 11x11 so it will fill the corners better. good luck!

Leave a comment

You may use these HTML tags and attributes: <a href="" title=""> <abbr title=""> <acronym title=""> <b> <blockquote cite=""> <cite> <code> <del datetime=""> <em> <i> <q cite=""> <strike> <strong>

  • Follow

  • About

  • Newsletter Signup

    Sign up for insights and deals

  • Shop

  • Archives

  • Separator

  • Sponsors