Elastic Waist Skirt Tutorial

Materials needed: fabric, 2-3 inch wide elastic and straight pins.
Now measure your child, Hattie has a 20 inch waist and I wanted the skirt to be about 13 inches long.
 I cut a 19.5 inch piece of elastic and an 11 inch piece of fabric. You want the skirt width to be at least 2x’s the width of the waist.  Hattie has a 20 inch waist, so I cut the fabric 11 inches by 40 inches.
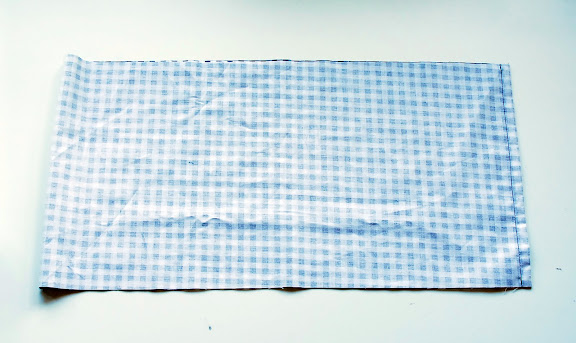
Fold your fabric in half length wise and sew a french seam.
Then, iron the bottom hem by first pressing 1/4 inch,
then 1/2 inch.
Then sew a 1/2 inch hem.
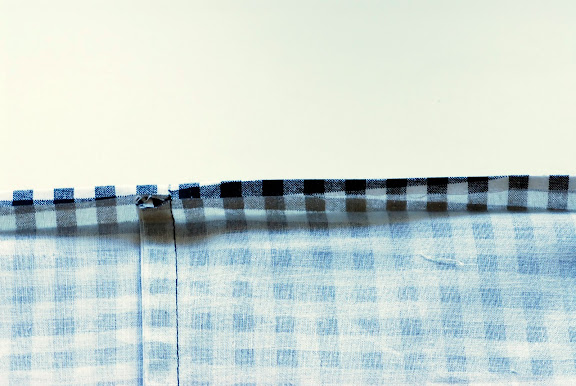
Sew your elastic.  You will not want to use white thread if you are using black elastic, I used white thread so you could see the stitch. Just stitch the edges together,
With right sides of fabric and eleastic together, pin the skirt to the elastic.  I start by sectioning off with pins, 4 equal sections.
Sectioning each of those sections off,
and again,
and again.
I know! That a lot of pins, but it is so much easier than stretching the elastic and hoping that you get an even ruffle around the skirt.
Sew the seam with a 1/4 inch straight stitch , then zigzag the edge. The zigzag stitch is another good substitution for a serger, admittedly it does take longer than a serger, but works just as well.
Can you believe how easy that was?

Comments

  1. Cori Hintze :
    That looks really complicated for a non-"sew"er like me, but next week we find out if I'm having a girl or not,and if so, I definitely want to learn!
  2. {natalie} :
    that black gingham is so awesome with the black elastic waistband. i love it.
  3. BuenoBueno :
    super cute!
    wish i had a daughter or neice to make this for!
    xo
    b
  4. Pink Dogwood :
    Just started following your blog and am enjoying it very much.

    I've been wondering about creating a skirt exactly like this. In fact, I almost picked up all of the supplies the other day at Fabric Depot and then got sidetracked by another project (as usual).

    It's great to see the idea I had in my head all laid out in pictures and directions. I have a hard time getting the design out into real-time.

    Gonna have to try this soon.
  5. liz stanley :
    i'm totally making these. for myself. or a future daughter. someone. thanks!!
  6. .caroline armelle. :
    darling!

    i've been wanting to make one for myself for a long time. was just thinking about it this morning. and, bam there's a tutorial. perfect timing!
    you're great to post these!
  7. Crissa Pollmann Robertson :
    I don't have any girls to make one for but secretively I want one for myself. Ladies, if any of you make them in adult sizes I would LOVE to see how it turns out!
  8. jen :
    love this! i will do this next, after i finish those pillowcase dresses!
  9. camie :
    oh cute! i believe i will make one... for myself.
  10. paula :
    ummm, could you make me one? pretty please with sugar on top? oh, and i DON'T have a 20" waist. hope that's not a problem.
  11. dana :
    adorably easy. And funny....I had a skirt JUST like that black gingham one in 8th grade, only the elastic waist band was about 7 inches wide. Remember those days?
    Thanks for the tutorial.

    and hey, just curious...why do you do all the pining instead of gathering the skirt piece and then sewing the elastic on? More control over the gathering? I've never tried it your way. I guess I'll have to!
  12. Susan Petersen :
    Dana,

    because i have to have almost complete balance in my gathers - i know, i'm crazy. i achieve that zen through the pinning.
  13. dana :
    good to know! And yes, when I gather, it is never totally even. You are a master.
  14. Melissa :
    Great tutorial, Susan! I'm definitely going to make one of these for Pen & try your zen gathering methods.
  15. handmade charlotte :
    so darn cute!
  16. Nicole :
    very cool. i haven't seen a pattern like this, with the elastic exposed. thanks... and cool graphics.
  17. Pamela :
    Thanks for this awesome tutorial. I am going to be pregnant all spring and summer and will be in desperate need of some preggo clothes. This skirt will come in very handy!!
  18. mindy :
    kind of excited. just made the rosette on a cute hair wrap. now i'm gonna attempt my first clothing item. thankfully i have a sewing friend who will help me. :) yay

    thanks for sharing these tutorials!
  19. Heather J :
    Susan! Thanks for your awesome tutorial. I just made one for my little's and i'm in love. Keep the hip and craftiness coming. :)
  20. Heather J :
    Susan! Thanks for your awesome tutorial. I just made one for my little's and i'm in love. Keep the hip and craftiness coming. :)
  21. Kellie :
    Thanks, this is gorgeous. I have lots of nieces so this will come in very handy! Thanks for the tutorial :)
  22. generic propecia :
    Excellent blog, I'm looking for information on how to improve my health, so I would like to help me with advice on the subject, thanks!
  23. Tiff and Rand :
    LOVE it! I just made my daughter THE cutest skirt EVER and it didn't take long at all!!! Thanks for this post and your entire blog, for that matter. It's great!
  24. So-Sew Seamstress :
    This tutorial is great! Just one question though, do you use regular thread? If so, how do you keep the thread from snapping once the skirt is stretched? I'm having some issues with a similar project and found your tutorial very helpful. Thanks
  25. Neldajay :
    wow! That was really easy..thanks for the tutorial...have a wonderful one!
  26. The DeClue’s :
    Wow!!! LOVE this!!!!! It was sooo easy! Thanks for all of your awesome tutorials! I also used your french seam tutorial! It was so helpful! Thanks for all you do!
  27. Mochi Needlecraft Home :
    it's so pretty, i love it. But I wonder.. is it still stretchy at the gather point?
  28. White Pheonix :
    wow! i <3 this tutorial! It's been the easiest by far!! Thanks! You have just made my life easier :)

    http://chicwunderland.blogspot.com
  29. Sarah :
    I finally used to this tutorial to make a dress!

    Thanks!!
  30. maryann P :
    Found your tut to make a dress form my adult neice and feel in love with it and whipped one out last ngiht for my 2year old.
    SO easy and I took like over pinning, I feel more confident and like the end result.
    Thank you so much.
    here is my lil hostile model
    http://i21.photobucket.com/albums/b287/xsychox/IMG_1474.jpg
    http://i21.photobucket.com/albums/b287/xsychox/IMG_1473.jpg

    She loved the skirt so much she couldn't bare to sit still
  31. British American :
    I made one!!! Thank you for this tutorial. I used it to make a skirt for my 5 year old daughter, using thrift store material that I bought 3 years ago. Here's a photo:

    http://www.flickr.com/photos/englishrose/4761294725/
  32. Flower store in uk :
    Hey great stuff, thank you for sharing this useful information and i will let know my friends as well.
  33. Meebs :
    Thank you for the great tutorial! I have a gorgeous silk dress, but the top half was ruined, and now I'm converting it into a skirt like this. Did you use elastic thread, or did you pull the skirt so the fabric was flat when you sewed the waistband to the skirt fabric? I tried this once already with plain thread and the thread broke.... any advice would be most welcome!
  34. Mariane Prospero Polins :
    Thank you so much! I just made one like this for me and loved it!
    I would like to tell you that I wrote a post on my blog and mentioned you tute, ok?
    You you like to check com here to see: www.marianepro.blogspot.com
    You you do not like it, just tell me and I will remove the post.
    Tks!
  35. Jacquie :
    I come back to this again and again. I love it and finally made two tonight for my girls to wear to church. They came out very nice.
    Thank you for this tutorial.
  36. Suhagra :
    Man I love this post and it was so good and I am going to save it. I have to say the superb analysis this article has is truly remarkable. Who goes that extra mile these days? Bravo!!! Just another tip you should install a Translator for your Global Audience...
  37. Sarah :
    thank you thank you!!! This exactly what I needed!!!!
  38. Stephanie :
    great tutorial! I have done it where you pin so much and stretch (not the waist band but for a bubble skirt). One successful time at getting it fairly even and the other, I didn't stretch it evenly the whole skirt so I had a 3 inch section that did not get as full. I will have to try this technique! Thanks for posting this.
  39. Penis Enlargement Pills :
    I am thoroughly convinced in this said post. I am currently searching for ways in which I could enhance my knowledge in this said topic you have posted here. It does help me a lot knowing that you have shared this information here freely. I love the way the people here interact and shared their opinions too. I would love to track your future posts pertaining to the said topic we are able to read.
  40. Susan P. :
    Great tutorial! I made one for myself (adult size) using a zig zag stitch and elastic thread as the bottom thread in my machine on the waistband, and it turned out great!
  41. amelia.mae :
    so helpfull! im making my own minnie mouse skirt for halloween and this helped so much! thankyou!!!!
  42. erica maree :
    This is by far, hands down, the best elastic skirt tutorial I have seen in a long time...photos are great, explanation is short to the point and easy to understand! Thanks so much for sharing...now off to explore the rest of your site!
  43. Jackie :
    Thank you for the tutorial :) I just made a skirt for my daughter-- my first but def not the last!!!! It was extremely easy, especially since our daughters have he same measurements :D
  44. Pingback: Tutorial: Sheer Ikat Skirt |

  45. Jessica :
    Do you use elastic thread or regular for sewing the fabric to the waistband?
    • freshlypicked :
      regular thread. stretching the elastic tight as you sew will give it all the givd you need.

Leave a comment

You may use these HTML tags and attributes: <a href="" title=""> <abbr title=""> <acronym title=""> <b> <blockquote cite=""> <cite> <code> <del datetime=""> <em> <i> <q cite=""> <strike> <strong>

  • Follow

  • About

  • Newsletter Signup

    Sign up for insights and deals

  • Shop

  • Archives

  • Separator

  • Sponsors